
Set Up Google Workspace Service Account Access
JITBackup for Google Workspace uses a Google Cloud service account to access Google Workspace APIs. Before starting the initial configuration wizard, create the service account and download its credential file in JSON format.
You can use the automatic generator or create the service account manually in Google Cloud Console. Use a Google Workspace administrator account so the project remains under your organization's control.
Automatic Service Account Setup
Privacy & Security: The automatic setup runs entirely in your browser, communicating directly with Google's APIs. JITBackup never receives, routes, or stores your setup data and JSON credentials. The credential file is a one-time direct download, so please keep it secure.
- Open the JITBackup Google Service Account Generator.
- Click Setup Service Account.
- Sign in with a Google Workspace administrator account.
- Grant all permissions requested by the generator.
- Wait for the process to finish. The file
jitbackup_service_account_key.jsonwill download automatically. If the browser blocks the automatic download, use the download link displayed by the generator. - Return to the JITBackup for Google Workspace initial configuration wizard and upload the downloaded JSON file during Domain Setup.
If your organization prevents automatic project or service account key creation, use the manual method below.
Manual Service Account Setup
- Sign in to the Google Cloud Console with a Google Workspace administrator account.
- Create a new project for JITBackup.
- Open IAM & Admin > Manage resources, click Create Project, enter
JITBackupas the project name, and create the project.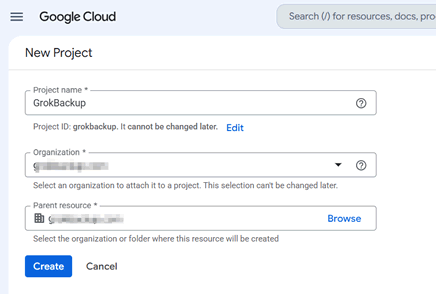
- Once the project is created, click Select project in the Notification that appears.
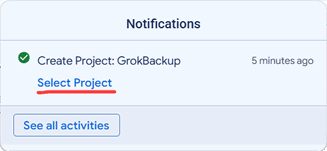
- You can also select the new project from the project selector at the top of the Google Cloud Console. Make sure it remains the active project during the next steps.

- Open IAM & Admin > Manage resources, click Create Project, enter
- Enable the required Google APIs.
- Open APIs & services > Library, search for
Gmail API, and click the result.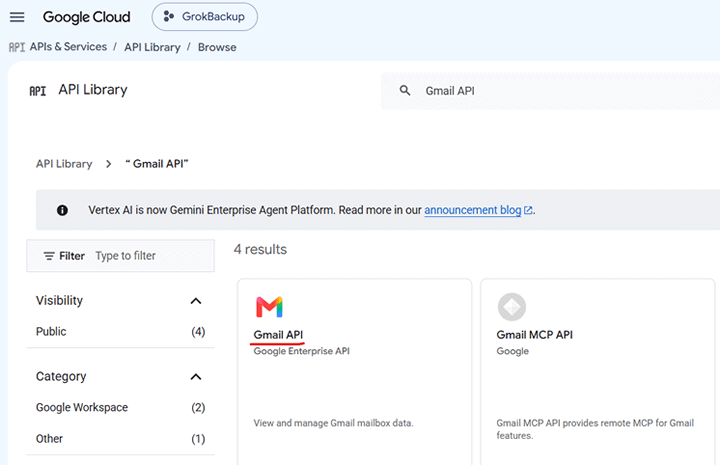
- On the Gmail API page, click Enable
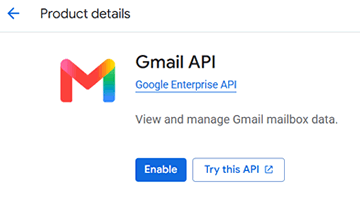
- Return to the previous page and repeat the above steps to enable the
Google Drive API,Google Calendar API,Google People API,Google Tasks API, andAdmin SDK API.
- Open APIs & services > Library, search for
- Create a Service account.
- Open IAM & Admin > Service Accounts, then click Create service account.
- Enter
jitbackupas the service account name and click Create and continue.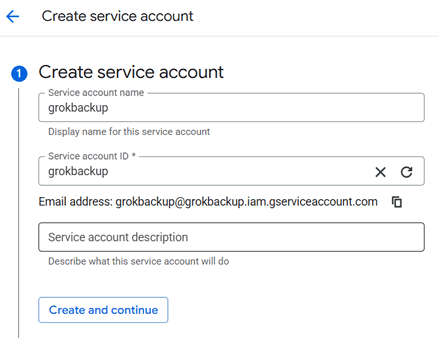
- In the Permissions step, select Basic > Owner as the Role, then click Continue.
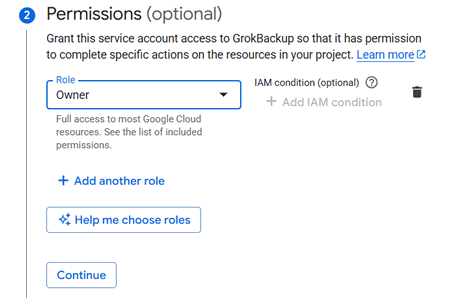
- Click Done directly in the Principals with access section to return to the Service accounts page.
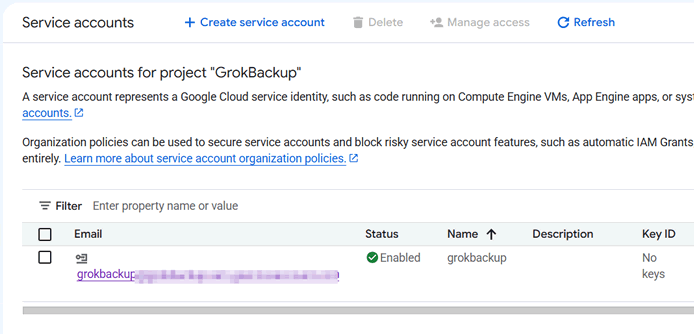
- Click the Email of the service account we just created to open the Service account details page, and select the Keys tab.
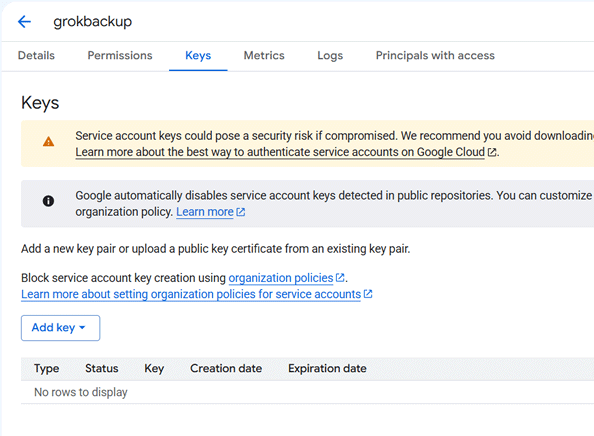
- Click Add key > Create new key, select JSON, and click Create. The credential file will download automatically.
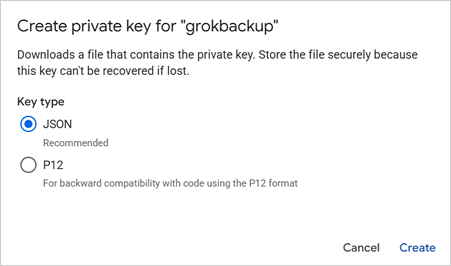
- Return to the JITBackup Setup Wizard and upload the downloaded JSON file during Domain Setup.
Important: The JSON file contains a private key. Store it securely, do not email it, and do not commit it to source control. Google only provides the private key when it is created.
Replace the Service Account
Do not delete or disable the current service account until the replacement has been tested successfully.
- Create a new service account credential file using either method above.
- Replace the credential in the JITBackup console.
- Add the new Client ID and the scopes displayed by JITBackup to Domain-Wide Delegation in the Google Workspace Admin Console. More details see: Authorize Domain-Wide Delegation.
- Verify that JITBackup can synchronize users and access Workspace data.
- Remove the old Client ID from Domain-Wide Delegation, then disable or delete the old service account key in Google Cloud Console.